This is a useful and pretty rare piece of kit from the 1980s.
Made in Japan, its great for clocking old gear .. esp Roland 808s, 909s, 303s etc
It enables sync between vintage Korg and Roland units. Not just MIDI sync but also DIN sync.
The KMS30 converts Midi clock to 24/48 PPQ
Old Roland gear uses 24 PPQ
Korg gear uses 48 PPQ.
So this box is useful if you want to sync a Roland TB 303 with a Korg KPR-77 drum.
There are actually 3 time formats - Tape, Midi, and Din Sync.
Tape sync is now pretty obsolete, but it may come in handy if you have an old tape multi track deck
You would need to record a TAPE CLOCK click track on one track of the tape. Then for your overdubs, as you play back the tape, you would connect the click track to the RCA tape in jack of the KMS30
The KMS-30 can also be used to record a click track onto tape.
Note, this "click track" is FSK --- not an analog signal.
The DDM-110 is an old Korg Drum machine.
There are plenty of old drums that will do this job, but it's a good example as it has
a TAPE OUT jack & DIN sync jack
You sync it to the KMS30 via DIN and record it's audio (from the tape out) onto tape to make the click track.
Power supply is a 9V external PSU polarity (negative tip) .
Thanks to Ed of Elk Elktroniks for repairing it for me.
A bit about Midi, and Din Sync.
In the case of Roland DIN Sync, the standard is 24PPQN.
Lots of old Roland Synths such as the TB303 & TR606, 808, 909 use this standard.
Most DAWs will also use a 24 PPQN signal
MIDI clock in comparison sends a tick 96 times per quarter note.
Korg has it's own version of DIN Sync.
It uses the same 5 pin cable/socket, but the PPQN is 48.
When syncing Roland and Korg gear via DIN sync, they will work,
however the Korg machine will run at 1/2 the tempo/speed of the Roland
unit.
This can be corrected with several devices which will
translate 24-48 sync, such as the Korg KMS-30.
Another useful and easy to find device which will translate to 48 PPQN is the Arturia Beatstep pro.
A bit about the Tape out on this machine.
Can the tape in/out be used for syncing the clock of analog gear?
No! Its Binary FSK (usually referred to simply as FSK) for syncing with multitrackers.
FSK is for slaving digital hardware to tape
FSK = Frequency-shift keying.
It is a modulation scheme typically used to send digital information between digital equipment such as teleprinters and computers.
You can actually hear the FSK signal if you plug it into some speakers.
There are 3 types of tone:
1. Clear, high pitch - leader tone. Usually it lasts for 3 seconds.
Indicates that data output is about to begin
2. Lower pitched-noisy sound - data tone.
Contains your patterns / songs/ clock encoded as digital data.
3. Clear, high pitch - end tone. Usually lasts for 2 seconds.
Indicates that data output is over.
Note that many old 1970s, 1980s era synths and drums have a TAPE sync in/out.
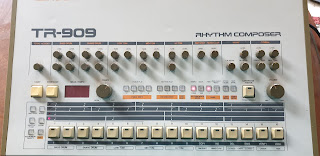
The TR-909 has DIN sync IN, TAPE sync IN/OUT and MIDI.
The TR-505, 626, 707,727 all have midi, DIN & FSK/TAPE which makes them
pretty useful.This is the rear of a 505.
This is the rear of a TR-707
Tape, in those days was really useful. In addition to being able to handle syncronization, you could also use it to store your pattern data.
The TR 707 & 727 drums have MIDI, DIN SYNC and TAPE SYNC sockets.
If you set it as the master, it sends sync
signals out from all of the sockets.
However, if you slave it to TAPE SYNC, it only
sends out MIDI and DIN SYNC signals.
When set to be the slave it does not send any sync signals.
The Roland MC-202 has TAPE IN/OUT, one DIN sync IN and two OUT sockets.
Sadly no MIDI. If you slave the machine to TAPE sync, it sends DIN sync out on both sockets.


 ....
....


